1 How to Disable Prefetch on Windows 102 How to Disable Superfetch on Windows 10
What is Prefetch and Superfetch? Even when you’re not using them, Superfetch loads frequently used programs into memory to speed up startup. Prefetch is a similar feature which was introduced already with Windows XP that gathers data about programs to also help them start faster. To achieve this, the prefetch algorithm tries to anticipate when data most probably won´t be available in cache to directly load it from the respective drive. This data is located in C:\Windows\Prefetch. Contrary to many blog posts, disabling Prefetch and SuperFetch for SSD drives is actually unnecessary. It IS true that Prefetch and SuperFetch won´t provide a huge advantage for starting applications from SSD drives, as they are fast anyway. In this respect one could actually switch off the service. But Windows 10 already does this automatically for Superfetch if an SSD is installed as system drive. This means you don’t have to worry about the lifetime of older SSD drives because of ongoing SuperFetch-requests. On Windows 10 PCs with normal hard disks it may make sense to deactivate SuperFetch in some rare cases. This is because the service causes increased system load and significantly more hard disk requests. Without SuperFetch, some slower computers even work better, though the startup of certain applications may take a little longer. However, this is more an exception than the rule. Prefetch actually should be always stay enabled, even on slower HDDs. Whether you perform better with or without SuperFetch, you have to find out for yourself. Below you find the necessary steps to disable Prefetch and Superfetch.
How to Disable Prefetch on Windows 10
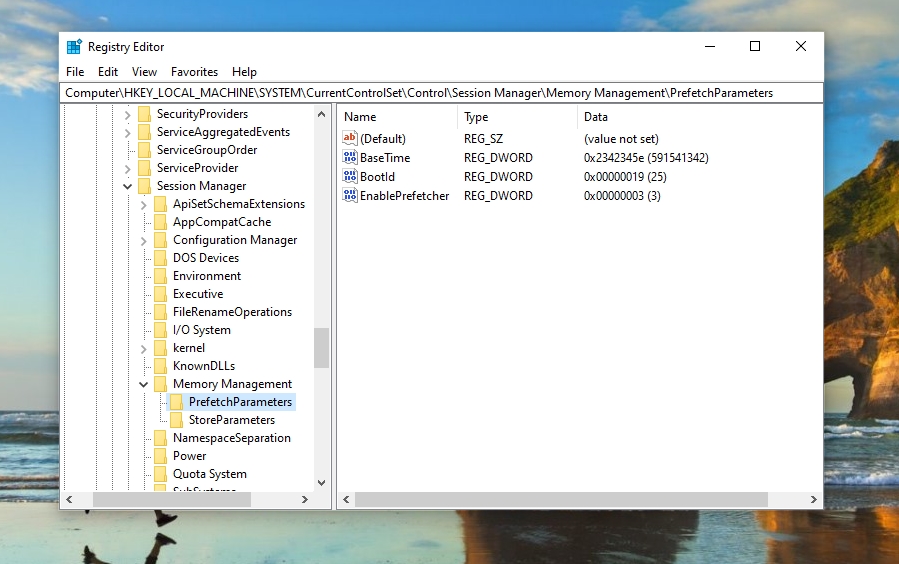
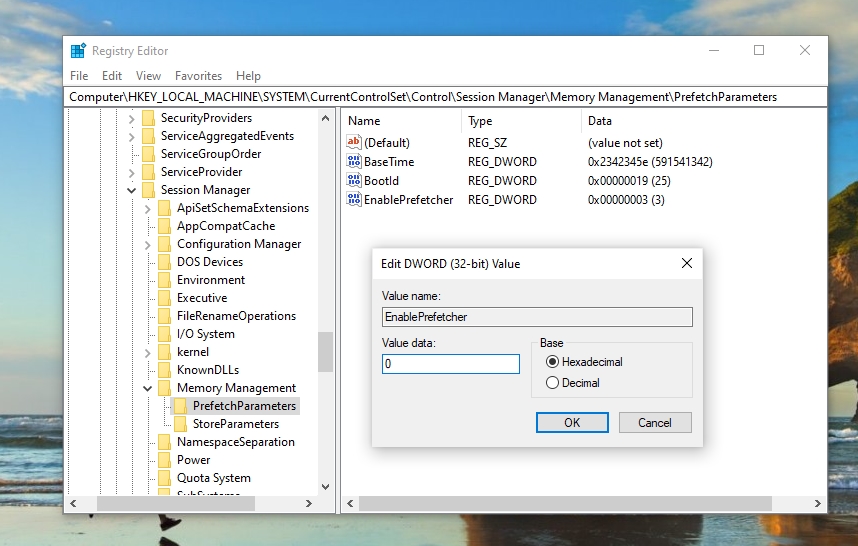
Open the “Registry Editor” using Windows 10 search. There, open the following location: “HKEY_LOCAL_MACHINE\SYSTEM\CurrentControlSet\Control\Session Manager\Memory Management\PrefetchParameters” Double-click on “EnablePrefetcher” to open this key and in “Value data” put “0” to turn Prefetch off. Here are the other available settings from 1-3: 1=Application launch prefetching enabled 2 = Boot prefetching enabled 3 = Applaunch and Boot enabled (Optimal and Default)
How to Disable Superfetch on Windows 10
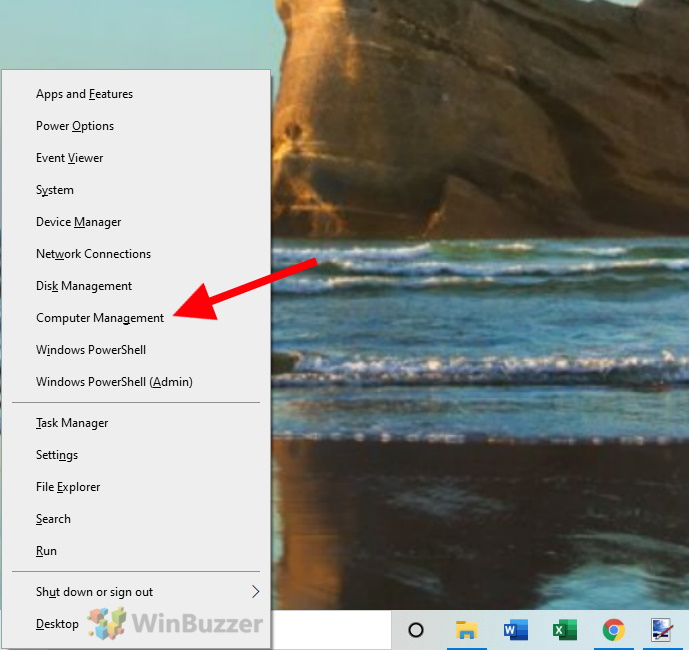
First, right click on the start icon in the taskbar to open the context menu. There you click on the entry “Computer Management”, which opens the system program of the same name.
Windows 10 – Start – Quick Access Menu – Open Computer ManagementOn the left side open “Services and Applications” and there “Services”. Select “SysMain” in the services list and click on “Stop the service”. This will deactivate Superfetch. Afterwards you can evaluate if your system works any better. To re-enable Super Fetch simply click on “Start the service” in the same view where you deactivated it previously.